Pages

Followers

Chalkdust and Pushpins

Powered by Blogger.

Sunday, October 7, 2012

Pumpkin Painting

 
I was so excited to decorate pumpkins this Halloween with Nolan.  I decided to head over to Pinterest for some ideas.  All you need is a pumpkin, painter's tape and paint.  For my pumpkins, all you need is chalkboard paint and and a liquid chalk pen. 

 Painted Jack O' Lanterns:
Step One: Cover your pumpkin with painter's tape and create a face.  Nolan wanted a happy pumpkin.
Step Two: Take an incisor knife and cut off the access tape, leaving the face.

Step Three: Let your little one paint away.
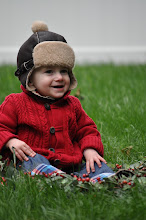
Step Four: Peel away the tape while it's still wet.  I then coated it with acrylic spray.
 

 Chalkboard Pumpkins:
I also decided to make chalkboard paint pumpkins.  This was super easy.  Paint with the chalkboard paint and let dry.  Use a liquid chalk pen to write a spooky message. 

Sunday, September 30, 2012

Fall is here!

My blog has been inactive for months due to lack of time.  My life has been overtaken by common core standards, plc meetings and a new reading program. I am also busy chasing around my almost 30 month old.  I decided this weekend that I need to find time for myself and that means starting my blog again.  I decided to make my own granola today.  I love pumpkin and granola so my fall recipe for today is pumpkin granola.  It is also low calorie and can be made into a gluten free recipe using gluten free oats.  I got the recipe from Skinnytaste.com and love how it tasted and made my house smell amazing.  I hope my son enjoys it as a snack as well.  My husband is taking a batch to work to keep on his desk. 

Ingredients:
  • 1/4 cup uncooked quinoa, rinsed well and pat dry with paper towel
  • 1 1/2 cups rolled oats
  • 1/4 cup ground flaxseeds
  • 1/4 cup sunflower seeds
  • 1/4 cup chopped pecans
  • 1/2 cup dried cranberries
  • 1/4 cup real honey
  • 1/4 cup pumpkin puree
  • 1 tsp oil (coconut or canola)
  • 1 tsp pumpkin spice (or more to taste)
  • 1/4 tsp cinnamon
  • pinch kosher salt
  • 1/2 tsp vanilla extract
Step 1: Preheat the oven to 350 degrees and line a baking sheet with parchment paper.

Step 2: After rinsing and drying the quinoa, place the oats and quinoa on the baking sheet.  Roast for 10 minutes, stirring once.

Step 3: In a bowl, combine the seeds, pecans and cranberries.  Set aside.


Step 4: Once the oats and quinoa have been roasted, add them to the bowl with the other ingredients.

Step 5:  In another bowl, combine the honey, pumpkin puree, oil, pumpkin spice, cinnamon and salt.

Step 6: Add the wet mixture to the dry mixture, using a spatula.  Lower the heat to 300 degrees and bake for 20 minutes.  After 20 minutes, I took the granola out and sprinkled a tab bit more cinnamon and baked for another 5 minutes.


This would be delicious added to a bowl of baked apples and milk. 

Sunday, February 12, 2012

Valentine's Day Treats

Mustaches are all the rage these days and I just think that they're funny.  My husband is always threatening to shave and just leave a mustache.  I have seen his college photograph when he was sporting a mustache....it wasn't good!  I decided to make these super simple lollipops for my students and Nolan's buddies at daycare.  Even if the kids don't think that they're funny, I bet their parents will have a good laugh with them.

Materials:
lip and mustache template
foam paper in red and black
lollipops
small hole punch

Trace the template, cut, then hold punch in the center of each lip and mustache. 

 
Attach to the lollipops.

 Have some laughs with your little Valentine!

Saturday, February 4, 2012

Love is in the Air

I haven't blogged in a few weeks due to getting back to work.  It was crazy the first week or two, but now I feel like I am back into a routine and can craft more.  My days can get crazy but I try to focus on crafty things on the weekends.  My husband is great and he will entertain N for a few hours which helps a lot.  February is one of my favorite months.  I get to celebrate my birthday and Valentine's Day which I love.  My students get a little crazy on the 14th but I love seeing how excited that get when they receive their valentines.  I decided to do a simple craft today to decorate my dinning room window.  This was fun and took no time.  The only part of the process that was annoying was sharpening the crayons.

Valentine's Day Crayon Hearts (seen on Pinterest, taken from Martha Stewart)

 Materials:
Wax paper
Crayon shavings
Craft paper
Hole punch
String


Step 1:
Shave crayons onto a piece of wax paper.  I ripped out the sharpener from the back of the crayon box.  I am looking forward to when N can help with the crafting.  He was busy taking a 2 hour nap.


Step 2:
Once you have a good amount of shavings, fold the wax paper over and make a crease. It is important that you fold the edges.  If not, the wax will pool out from the paper.  Place the wax paper between craft paper.  Then, place a towel on top and iron back and forth.

Step 3:
Let the wax paper cool.

Step 4:
Cut out a few heart templates.  Then trace and cut.  When all the hearts are cut out, hold punch them and hang with yarn. 


Final Products:  Hearts that spruce up your windows for Valentine's Day.  They look great in the window especially when the sun is shinning. 

Some people have used clear string, but I thought the pink yarn looked great.

Tuesday, January 3, 2012

Photography Projects

My friend Beth told me about a photography project that she was doing via facebook.  I decided to join in the fun.  Each week you submit a photo that represents a letter.  Each week the letter changes and we will go through the alphabet twice.  Here is what I submitted for a. 
After going through the alphabet once, I thought it would be a good idea to create an alphabet book for Nolan with all the pictures I use ( he is obsessed with letters).  I saw that idea on Pinterest. 

I have been having fun with picnik and decided to edit a picture describing what Nolan loves at 20 months (Beth's idea once again). 
 Both pictures were taken by my sister Chris.  Now I am thinking about getting a better camera in the future to take some shots of Nolan, but my sister does take some good photos. 

Thursday, December 22, 2011

Candy Cane Chocolate-Covered Pretzels

I wanted to make a gift for Mike's staff and my family who will be joining us on Christmas Eve.  I was interested in making a yummy treat that would look great packaged.  I am obsessed with the Trader Joe's Peppermint Pretzel Slims.  I decided to make my own version to give as Christmas treats.

Ingredients:
24 oz. white or semi-sweet chocolate chips
pretzels ( I used mini but pretzel thins or rods would work well too)
A package of candy canes crushed

Step One:  Melt the chips using a double boiler.

Step Two: Dip the pretzels into the chocolate.  Place the pretzels onto wax paper, then sprinkle with the candy canes.

Step Three:  Put the pretzels in the fridge to set


Step four: put them in holiday packaging.  Hope your friends enjoy them!

Tuesday, December 20, 2011

Candy Cane Playdoh

I decided to make Nolan's friends a little treat for the holidays.  Another great find on pinterest! I thought candy cane playdoh was a great idea.  I did change one thing only...no glitter!  I have a real issue with glitter. I hate when it gets all over the place and I just find it to be a pain, but if you wish you can add glitter into the batches. 

Ingredients:
5c. flour
5c. water
2.5 c. salt
3 tablespoons of cream of tartar
10 tablespoons of vegetable oil
red food coloring
a few drops of peppermint essential oil

Note: Split all ingredients in half and follow directions for a batch of white dough, then repeat with remaining ingredients and add red food coloring. 

Step One:  Mix water, salt and cream of tartar.  Cook on low heat, stirring regularly.  

Step Two: Add oil, then flour.  Stir over low heat.  The playdoh is done when it pulls away from the pan and is no longer sticky. 

Step Three: Dump dough on counter, let cool a bit, then knead.


Step Four: Add peppermint essential oil to the batches of dough.  I added about 10 drops per batch.  Add the red food coloring to the second batch. 
Step Five:  Roll the dough and intertwine the two batches together, making a candy cane pattern. 
Step Six: Cut the dough and place in mason jars.  I also added a candy cande cookie cutter onto each jar with a label.
The Final Product:  A batch of homemade candy cane playdoh for Nolan's friends to enjoy.